Thanks to http://www.wikigain.com
To install macOS High Sierra on VirtualBox on Windows PC you must download the following files and read the step by step guide to avoiding any problems.
Required file for this installation:
- Download macOS High Sierra 10.13 Final (1 Part)
- Download macOS High Sierra 10.13 Final (8 Parts)
- Download VirtualBox Latest version
- Download VirtualBox Code
- Download VirtualBox Code “New”
Step 1. Extract macOS High Sierra Image File
Once you have downloaded the macOS High Sierra and other required files then you need to download and install WinRAR or 7Zip. For this demonstration, I have installed Winrar. Locate your macOS High Sierra file in an appropriate location then right-click and select Extract to macOS High Sierra Final. Wait for a while and go to the next step down below.
Step 2. Install VirtualBox on Your PC
Download VirtualBox from the link above and then Install it on your Windows PC. To install VirtualBox, just click on the setup then hit “Next” for a couple of times and Finally, click “Finished”.
Step 3. Create New Virtual Machine
#1. It’s the time to create a new Virtual Machine. Open the VirtualBox then click on “New” at the upper left-hand side. Type the name for the Virtual Machine “macOS High Sierra Final” or any other name that you like. Choose the type “Mac OS X” and version to “macOS 10.13 High Sierra (64-bit)” or “Mac OS X (64-bit)” then increase the memory size to minimum 4 GB (4096 MB). From the Hard Disk section select “Use an existing virtual hard disk file” and click on the small folder icon to browse the VMDK file.
#2. Once you clicked on the small folder icon, you will see the snapshot down below. Navigate to macOS High Sierra Extracted file that you have done on step #1. Select the VMDK Image file and click Open.
Step 4. Edit the New Virtual Machine
#1. Open the VirtualBox then click on “Settings“.
#2. In the “General Tab“, don’t touch anything and let everything to the default. Go to the next option “System“. You will see three main categories. Click on the first tab “Motherboard“. Uncheck “Floppy” drive and set the chipset to “ICH9“. The memory size should be at least 4 GB.
#3. In the Processor tab, select 2 Processors or more than that. Don’t forget to tick mark Enable PAE/NX.
#4. Navigate to “Display option” then put the video memory to 128 MB. Check out Enable 3D Acceleration if you want. You can bring changes later on as well so don’t worry.
#5. Now, navigate to “Network” section then “Enable Network Adapter”. And choose the adapter type “Intel PRO/1000 MT Server (82545EM)”.
Step 5. Add VirtualBox Code to the CMD
#1. Find VirtualBox code that you have downloaded. Replace “Your Virtual Machine Name” with your virtual machine name that you have created on step Step #3. Just do like the shot down below.
Warning: Before adding the code to CMD make you sure you quit or exit VirtualBox.
#2. Open and Run CMD as Administrator and then copy and paste all the codes to the command prompt one by one.
Step 6. Start the Virtual Machine
#1. Once you have all the steps above successfully, you need to start the virtual machine. Just click on Start icon.
#2. Now you will see a black screen with white text on it and load some codes. Be relax and wait for a moment until you see the Welcome window of macOS High Sierra.
Step 7. Perform a Clean Installation of macOS High Sierra
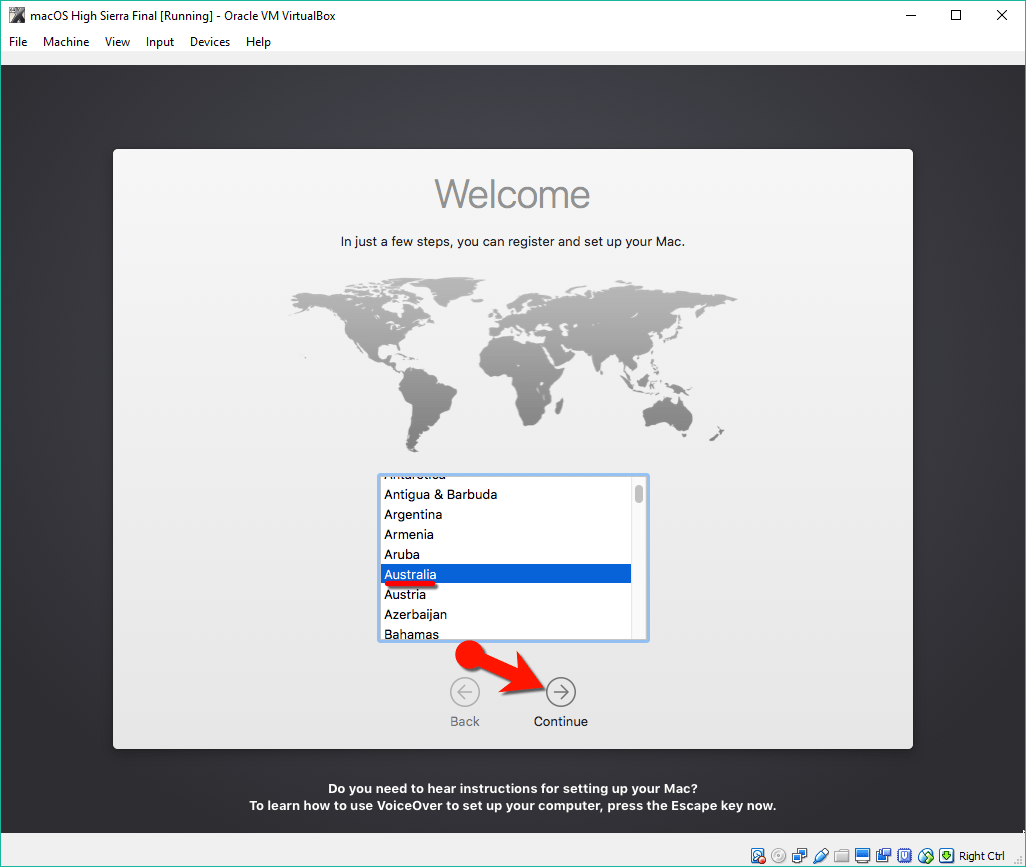
#1. It’s time to perform macOS High Sierra clean installation. Select your Country and click Continue.
#2. Choose a Keyboard Layout and click on Continue. If you did not see your preferred keyboard just click on Show all text.
#3. Now select your method to transfer information to this Mac and click Continue. We recommend you to choose the last option “Don’t transfer any information now“.
#4. In this step, select Don’t Sign In. To complete the Installation process we suggest you don’t use your Apple ID right now. You can login to your Apple ID or iCloud later on.
#5. Agree to the Terms and Conditions and click Continue.
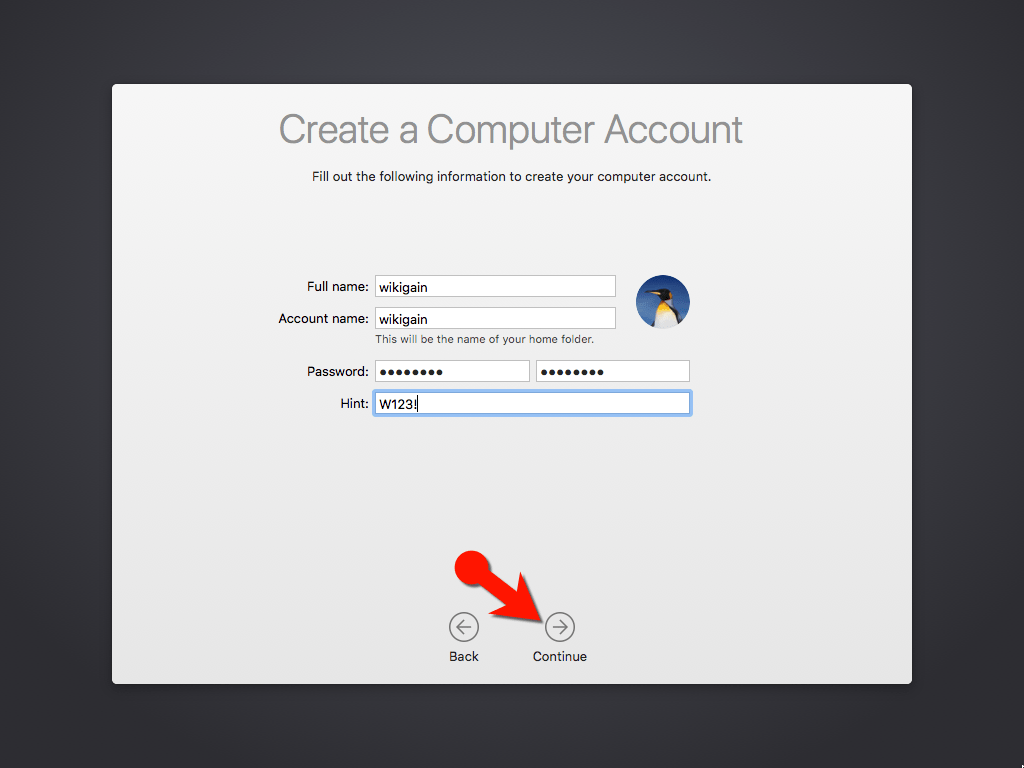
#6. Fill out the Full name, Account name, Password, Hint and check the box of Set time zone based on Current location. Then finally click on Continue to create your user account for macOS High Sierra.
#7. If you want to customize Express Set Up, you can click on Customize Settings otherwise click on Continue.
#8. Wait a little while to Setting Up Your Mac.
Finally, you should see the macOS High Sierra Wallpaper, and it successfully installs on VirtualBox.
Note: If you have any kind of issue with installing macOS High Sierra or lower version Just visit our guide down below.
Conclusion
In this guide, we have covered the following steps. These are the summarize of above steps.
- Extract macOS High Sierra Image File
- Install VirtualBox on Your PC
- Create New Virtual Machine
- Edit the New Virtual Machine
- Add VirtualBox Code to the CMD
- Play the Virtual Machine
- Perform a Clean Installation of macOS High Sierra 10.13.
If you have any kind of questions or have suggestions on how to install macOS High Sierra on VirtualBox, feel free to leave a comment down below this post and will answer your every question and get your suggestion for our future works. Thanks for being with us.